Buying items quickly after you’ve decided to buy is a critical step to winning newly listed items on eBay.
uBuyFirst streamlines this process with multiple fast checkout options.
uBuyFirst is the only current newly listed BIN software that allows users to purchased directly through eBay’s API and be able to make offers directly from the application.
Having this ability allows for a seamless buying process that saves valuable time when you’ve made the decision to buy.
Using these features will allow you to win many more of the item that you might otherwise lose in a race to checkout through the web browser while also keeping your focus on new listings.
Skip to Tutorial Section:
- Buy Button Options
- Make Offer Options
- Pay Now vs Commit to Buy
- Setting Up Commit to Buy
- Commit to Buy Confirmation Window
- Buying Logic
- Auto Pay Filter Option
- Customize Purchase Review Dialog Box
Using the Buy Buttons
The BUY and MAKE OFFER buttons are accesses via a panel modules.
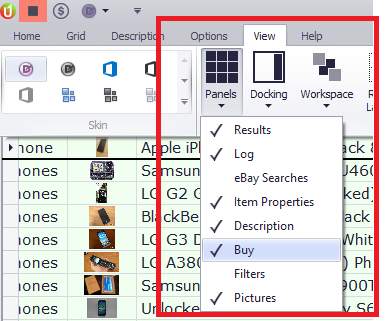
It can be accesses by navigating to VIEW>PANELS>BUY if it’s not already appearing in your layout.
When you’ve decided to purchase an item, simply click on the BUY button and you’ll be directed to checkout via the fastest option for that particular item.
There are two types of items for all eBay listings:
- Commit to Buy Items – Does not request an immediate paypal payment to secure the item and can be paid later, within a certain amount of days selected by the seller.
- Require Immediate Payment – Requires the buyer to pay in full before checkout is completed and an item is “won”.
- For Require Immediate Payment items, clicking on the BUY button will direct you to your PC’s default browser where you can checkout through the listing.
- Commit to Buy items can be purchased directly through uBuyFirst with a few clicks where you can pay later through the browser.
Also, you can always open the item in your default browser by double clicking the listing record in the results grid.
However, it’s common best practice to use the Buy/Commit to Buy items through the available buttons to reduce repetitive decision making and increase your chances of winning an item where multiple buyers will win or lose based on their ability to checkout more quickly than others.
Make Offer
Using the Make Offer option can help you get some cheaper deals if a seller has configured an auto-accept price.
The challenge has often been that the risk wasn’t worth the occasional reward since you could lose to another buyer who would choose to buy at the sellers buy it now price instead of making an offer.
uBuyFirst has streamlined this process so if you decide to try, you’ll be able to do so quickly. If the seller doesn’t auto accept, then you can proceed straight to checkout via standard methods.
Make Offer Indicators
- With the BUY panel, the MAKE OFFER option will only be visible if the listing type matches. If not, the text will be greyed out.
- You can also access both fields within the results grid if you prefer.

Commit to Buy vs Immediate Payment Required
There are two types of “Buy-It-Now” items on eBay.
- Commit to Buy – Where the seller has indicated that an immediate payment is not required. Clicking the “Buy It Now” button on the eBay website directs to a page to “Commit to Buy” where the listing quantity will be reduced (if quantity is greater than 1) or removed (if only 1 quantity) and allow the buyer to swing back around and checkout via PayPal within a specified amount of time designated by the seller.
Example:
From listing you can determine if a seller has chosen to allow “Commit To Buy” by clicking on the PAYMENTS tab just above the item description
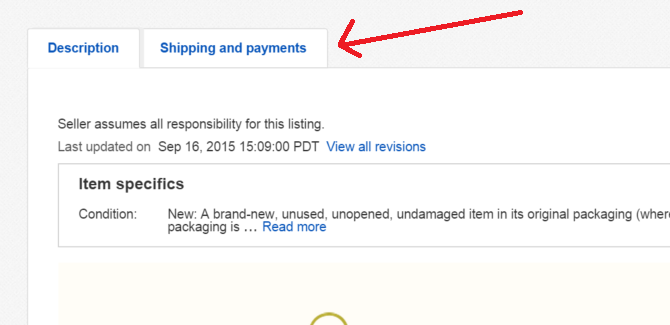
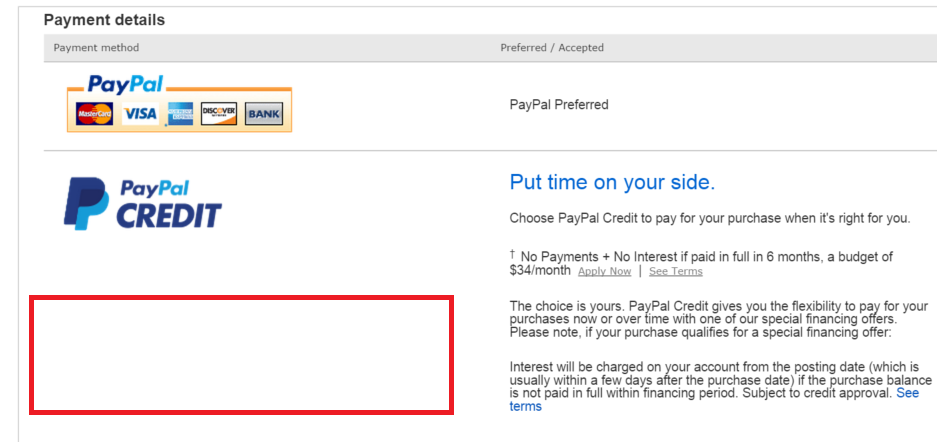
Then scroll down within the “Shipping and Payments” tab to “Payment Details” If there is no text about an immediate payment required, then the item qualifies to be purchased with a buyers “Commit to buy”.
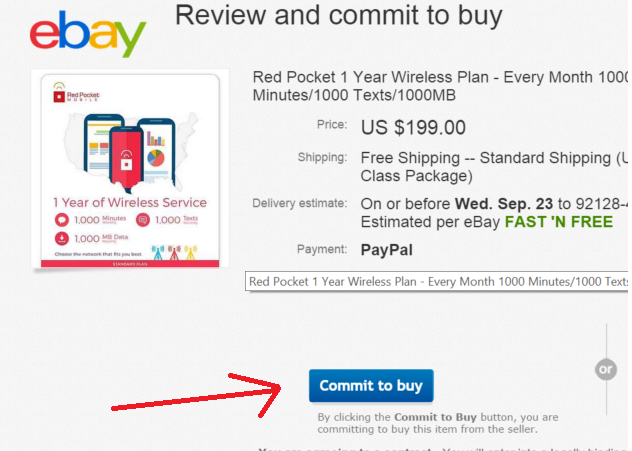
If the buyer proceeded to checkout, they would see the “Commit to Buy” button in the image below.
Immediate Payment Required
The second type of payment is “Immediate Payment Required”. This payment setting required the buyer to successfully pay for the item before the listing is removed or the quantity is reduced (for dutch listings)
For reference, if an item required an immediate payment the eBay listing page would note this under the “Shipping and Payments” tab on the item page saying “Immediate payment required for this item” (where commit to buy items simply display no text about payment)

If you click “Buy-It-Now” from the listing page, you would be directed to the one step checkout page (if enabled) where you would be required to pay for the item immediately before the listing would be taken down and successfully won by the buyer.

Setting Up “Commit to Buy”
You must authenticate your eBay account with uBuyFirst if you wish to purchased directly through the application. Once you’ve done so, you’ll want to ensure the “Buy” panel is enabled and displaying on the application interface.

If the “Buy” panel is not showing, navigate to the top navigation ribbon and select VIEW > PANELS > BUY. The buy module should appear within the interface.
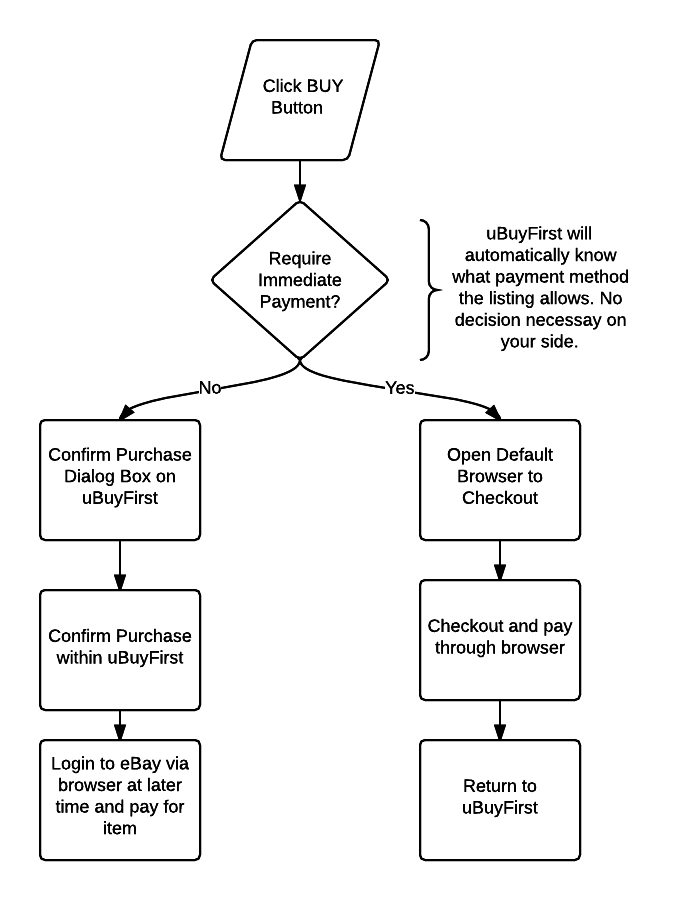
Buying Logic
uBuyFirst will automatically determine if the listing is able to be purchased directly from the application or if you’ll need to navigate to browser to complete the checkout process. Once you’ve decided to make the purchase, simply click the BUY button. If the listing is COMMIT TO BUY a dialog box will appear within uBuyFirst to confirm the purchase. If the item requires immediate payment, you’ll be directed to your default browser. The below illustration shows the decision logic uBuyFirst will take.
Commit to Buy Confirmation Window
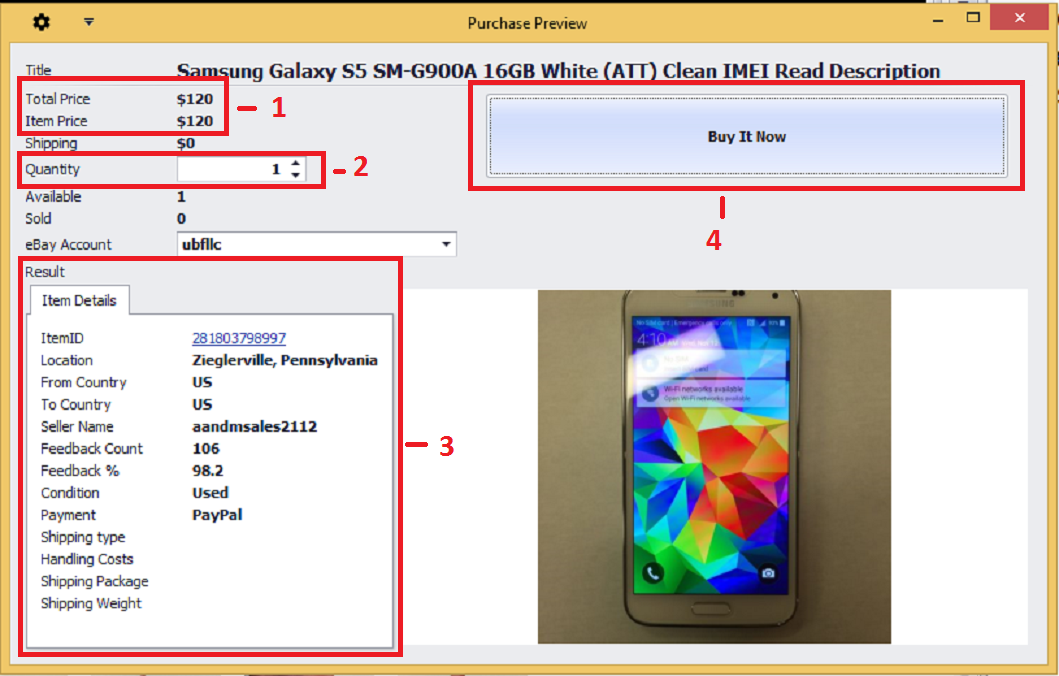
- Review price if needed
- Review Quantity if needed
- Review all other item specific details if needed
- Click the “BUY IT NOW” button to purchase
- In addition you can select which eBay account you wish to purchase with if you have multiple eBay accounts setup.
Directly after you’ve clicked the BUY IT NOW button a confirmation message will appear just below this button with success or error message.
Auto Pay Field
Also, if you wish to know if an item is commit to buy or not before clicking the buy button, you can make use of the “AUTO PAY” field within the RESULTS or ITEM PROPERTIES panels.
- True = Require Immediate Payment (Checkout through browser)
- False = Can use commit to buy through uBuyFirst
Make Offer (Best Offer)
Using the commit to buy function is a great way to quickly see if you’re able to snag a newly listed item for less with an automatic best offer acceptance. If the offer doesn’t auto accept (or reject) then you’ll still have the opportunity to buy if the price is right. Within the “BUY” panel, the “MAKE OFFER” icon will be greyed out if not available and show normal black text if it is available.

Above shows when MAKE OFFER is available.

Above shows when MAKE OFFER is NOT available.
A similar dialog box for COMMIT TO BUY will appear where you’ll see an additional tab for MAKE OFFER in the bottom left corner.
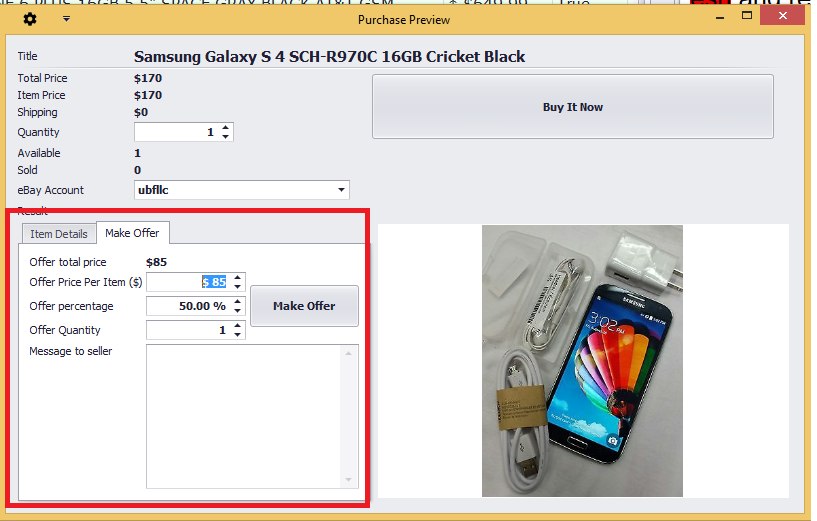
- You can set a standard percentage (%) to be applied for offers. Ex: If your first offer is typically 50% of the BUY IT NOW price you could input 50%. Every time you click MAKE OFFER the BUY IT NOW PRICE at 50% will be automatically populated to save time.
- You can offer per item if the quantity is greater than 1.
- You can leave a message to the seller if you wish.
- When best offer price is complete, click the MAKE OFFER button.
- A dialog box under the BUY IT NOW button will return the status of the offer (DECLINED, ACCEPTED, PENDING)
- You can also include the BEST OFFER field in the RESULTS and/or ITEM PROPERTIES panel.
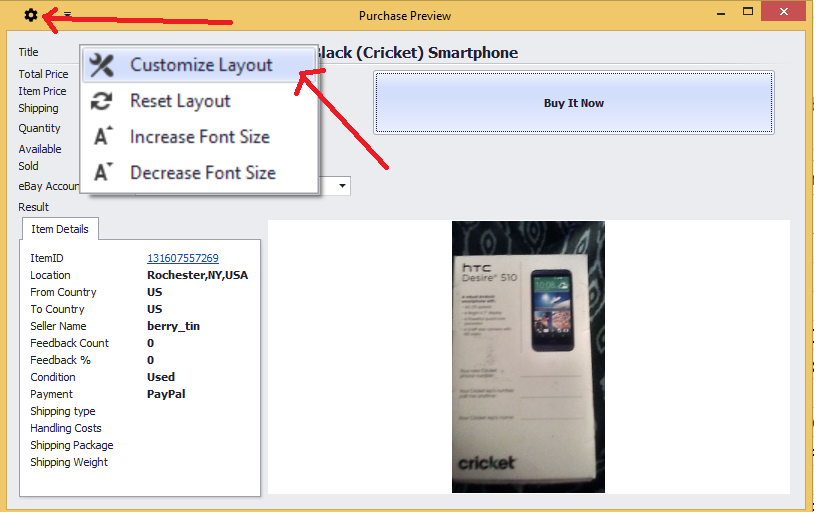
Customize Panel
- You can also customize the layout of the buy confirmation and best offer panel by clicking the gear icon
- Once clicked, select “Customize Layout” then go to the LAYOUT TREE VIEW and drag items from HIDDEN ITEMS to ROOT (add field) or right click and remove (delete).
- Ensure you save your layout with the save button and then re save your workspace layout.
NOTE: Double clicking on a listing in the RESULTS panel will always open the item with your default browser.