
The whole loop in one sitting (uBuyFirst Web App)
Post-Sale Management (PSM) is where your eBay purchases live after you buy: pull orders in, check items in as they arrive, and work everything — statuses, seller messages, feedback — from one place. Here’s what you can do and how you do it. Enjoy. Ask questions. Let us know what works and what doesn’t.
Table of Contents #
The Loop #
1. Open Post-Sale Management #
Head to the Post-Sale Management module first. Once you’re in, the left rail is your menu: Home, Orders, Receive, and Settings. That’s the whole map — everything below happens in one of those four.
2. Connect your eBay account #
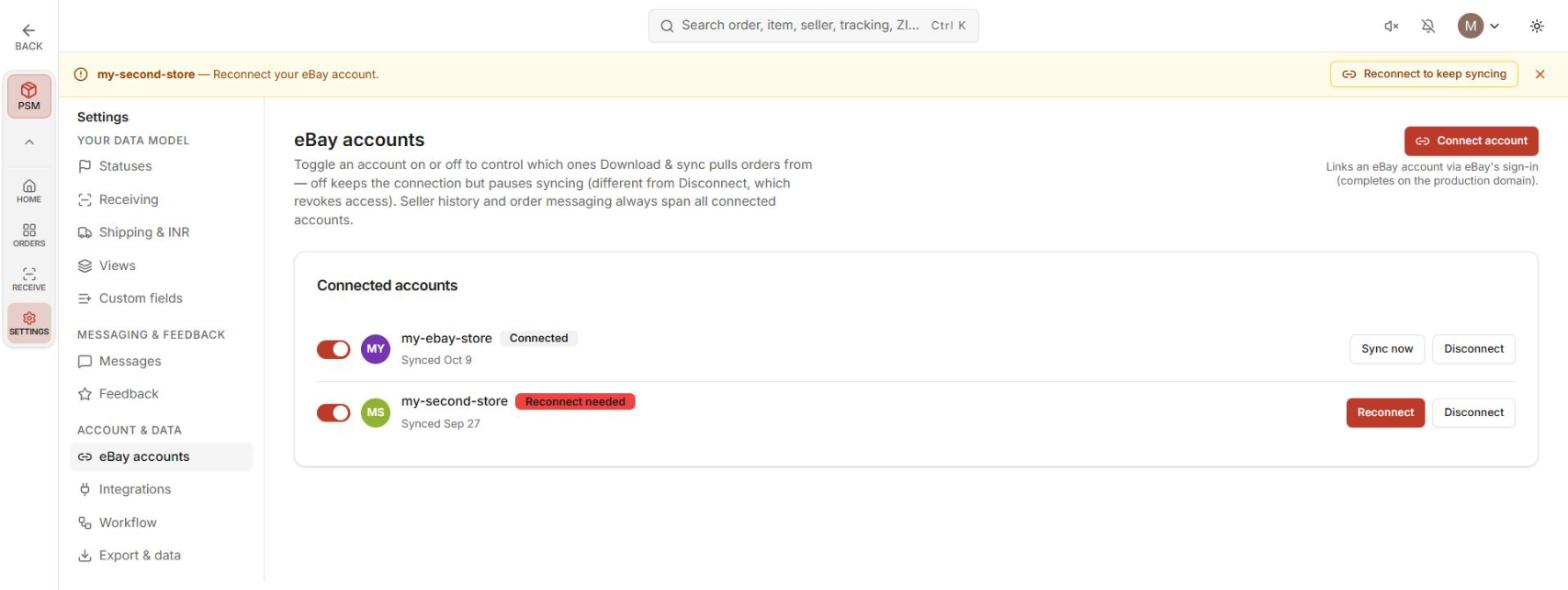
Settings → eBay accounts → Connect account. It signs you in through eBay itself — we never see your password. You can connect more than one account; syncing and seller history span all of them. Each account has its own sync toggle if you ever want to pause one.
Known Quirk.
There’s no confirmation banner yet after connecting — just check that your account shows up with a “Connected” chip.
3. Download & sync #
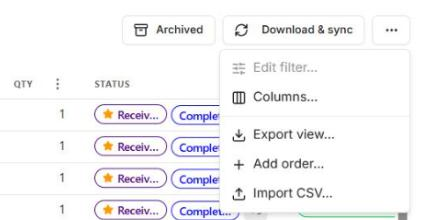
Download & sync is always there at the top of the Orders page — and it’s manual. Click it whenever you want to pull your latest orders in; they land in the grid.
Known Quirk.
Sync doesn’t show a progress message yet — give it a few seconds, then check the grid.
4. Work your filter views #
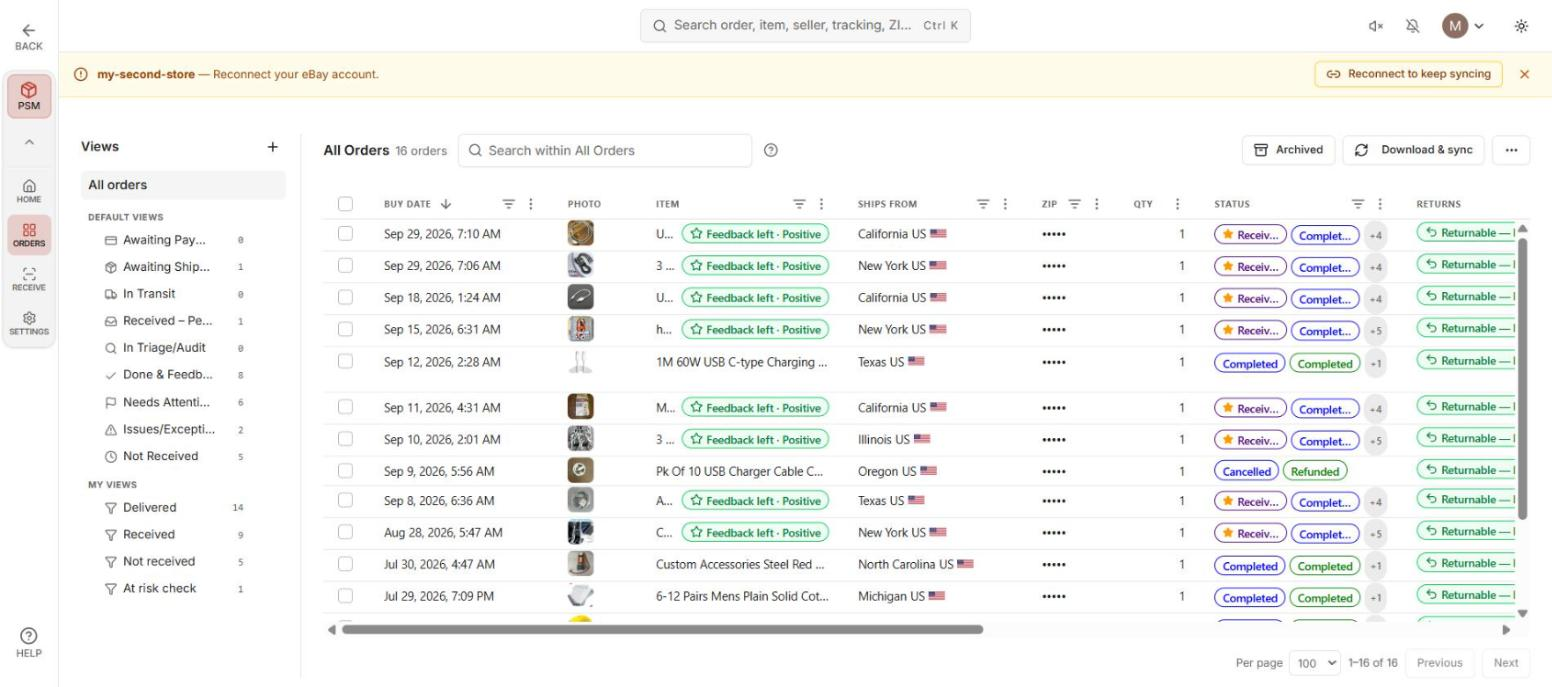
Your orders live in filter views — the list down the left side. A view is a saved filter with its own columns, so each one shows exactly the slice it’s named for. Defaults are ready to go: All orders, Awaiting Payment, Awaiting Shipment, Shipped, Not Received, and so on.
You can create your own too — build a filter from any of the order fields, save it as a view, and it joins the list. In Settings → Views, star one to make it your landing view.
5. Receive items in #
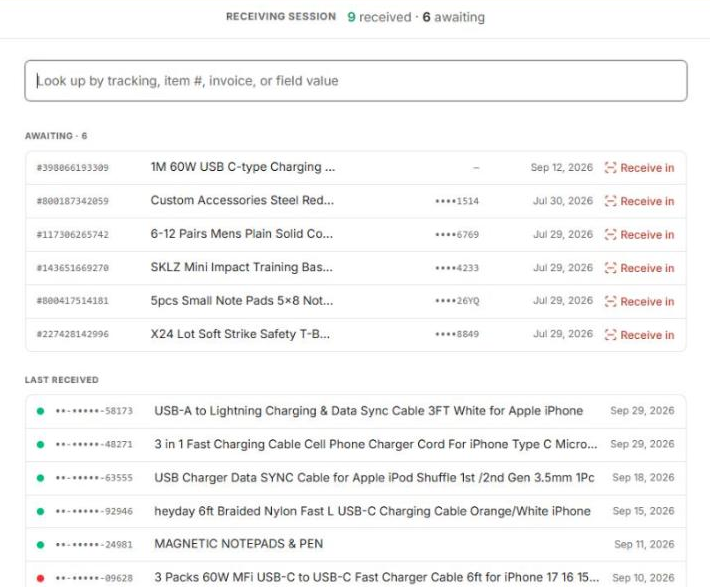
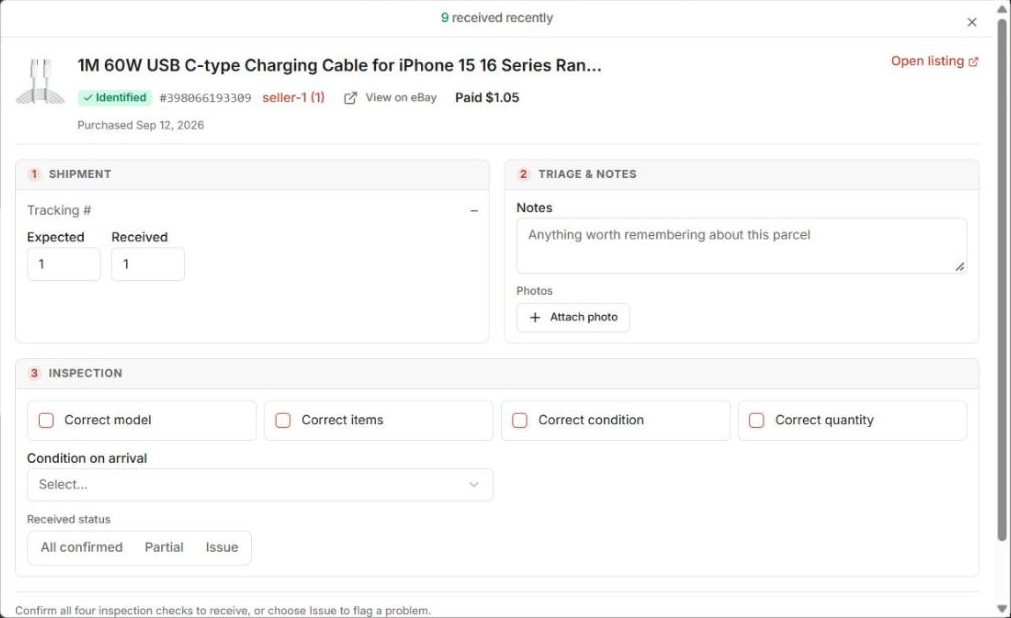
Receive is the check-in desk for packages as they arrive. It’s basically a lookup: type a tracking number, item number, invoice, or any variable in the data, find the order, and hit Receive in. Confirm the quick inspection checks, mark it All confirmed / Partial / Issue, attach photos if you want a record — done, it’s received in your workspace.
You can customize the check-in with your own receiving fields (Settings → Receiving) — grading, bin location, whatever you track.
6. Everything else is right in the view #
From here you’re going straight into the view — all the information is there, and the order is worked where it sits:
- Statuses — every order carries eBay’s own statuses (order, payment, shipping, return, feedback — synced, read-only) plus yours. Set yours from the order page (the Order overview card, under Yours ★) or straight from the grid.
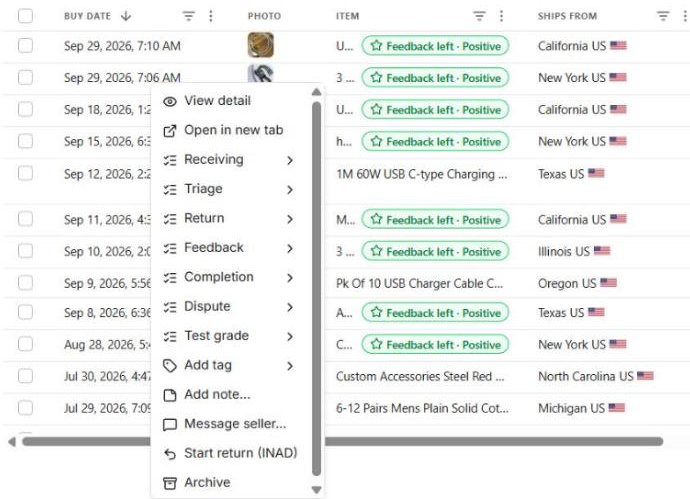
- Right-click an order (or open it and use Actions ▾) for the rest: Message seller (uses your templates from Settings → Messages — merge tags like
{order},{seller}, and{tracking}fill themselves in), Leave feedback (from the order page’s Actions ▾; templates in Settings → Feedback; star a default — the Feedback status flips to “Left” automatically), add a note, mark received (right-click → Receiving ▸ Received), and more.

7. Done #
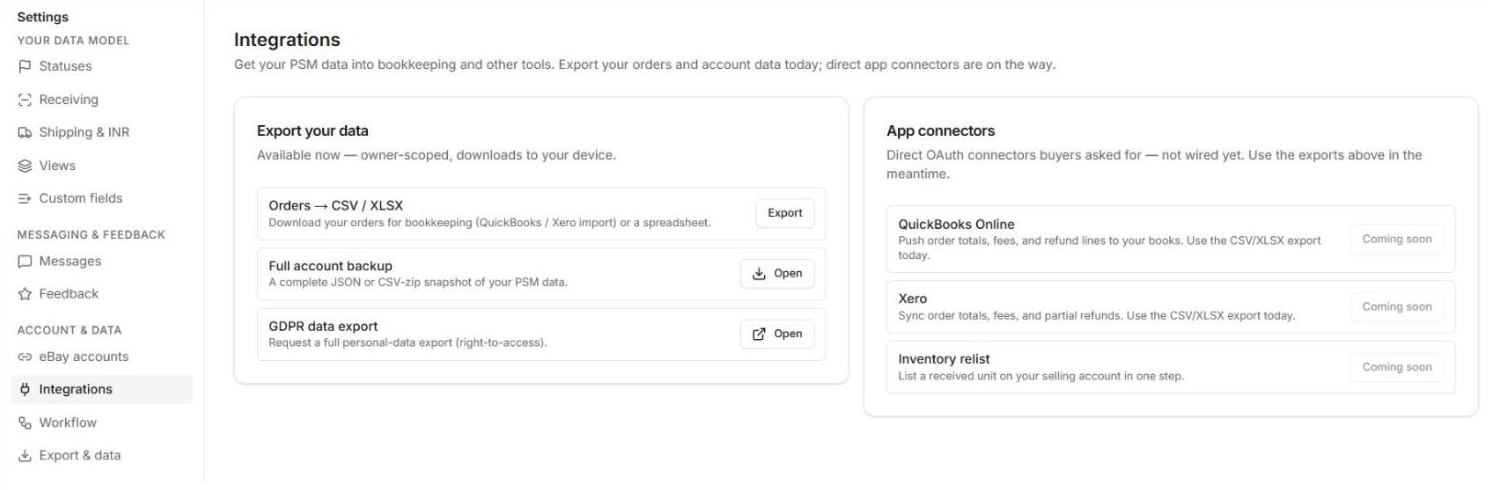
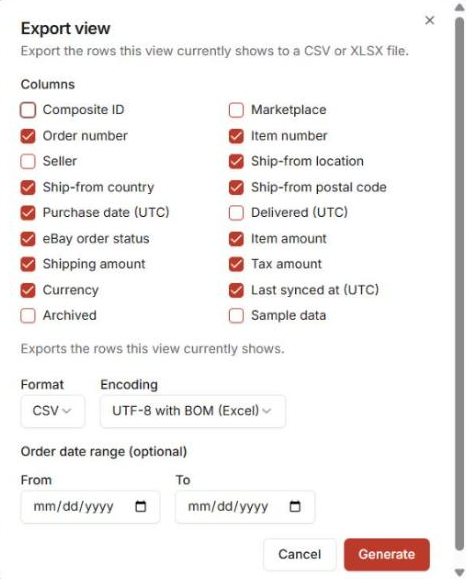
Most people treat feedback-left as the end of the line — everything else is in-between. When you need your data elsewhere, any view exports to CSV or XLSX: grid … menu → Export view, pick your columns and an optional date range. A full account backup lives under Settings → Integrations.
Make It Yours #
- Custom receive fields — Settings → Receiving: add up to 10 of your own fields (text, checkbox, dropdown) and they show up right on the receive form.
- Custom status sets — Settings → Statuses: name a dimension, add values, pick colors. They show up on orders, in the right-click menu, and as grid columns. (Known quirk: values archive rather than delete for now, so retired values are hidden, not gone.)
- Triage tags — quick, looser labels for when something’s off. Define them under Settings → Receiving. (The spot where you apply them is still being wired up — define them now, applying gets smoother shortly.)
- Columns — grid … menu → Columns to pick exactly what each view shows.
- Home — drag the dashboard modules around to match how you work.
Ask Us #
If you need different fields for certain things — or anything doesn’t work the way you’d expect — tell us. This module is young and your feedback steers what gets built next.
Go deeper per area: Post-Sale Management Overview links every PSM article.


