
Now that you’ve entered a keyword search and you’re viewing results, it’s time to ensure all available data is present and you format the most important data that might further qualify or disqualify an item for purchase.
The goals:
- Have all item information present so you don’t need to visit the eBay website item page
- Highlight important fields and words in results view with filter rules.
Each user has varying requirements based on the number of items, product type and their own internal purchasing guidelines, therefor each setup will be different.
We’ll go over the features that help you with this and some examples to help generate an idea of what might work best for you.
Item Specifics #
Item specifics give you a full picture of a listing in the results grid, without opening it on eBay.
Example: for cell phones, the item specifics Network, Storage Capacity and Lock Status can raise or lower a listing’s value, back up a vague title, or qualify or disqualify a listing under your own purchasing rules.
Add Item Specifics #
- Open Grid → Items Specifics. The Custom Columns window opens.
- Pick the eBay Site you buy on.
- Type the category name or ID into the Category box and pick it from the list that opens (Enter picks the highlighted one), or click the ▼ arrow to browse the category tree.
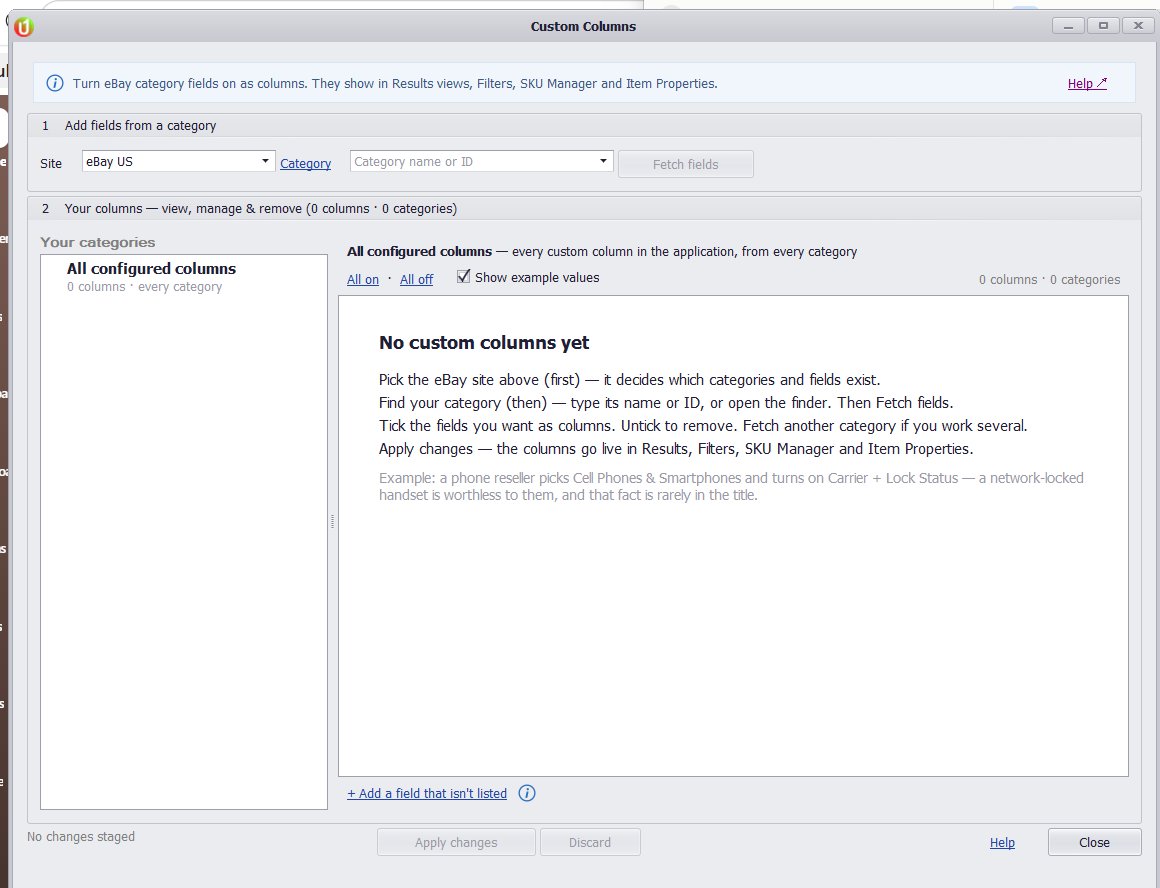
- Every field eBay offers for that category loads, with example values. A category with sub-categories loads nothing until you pick one of them.
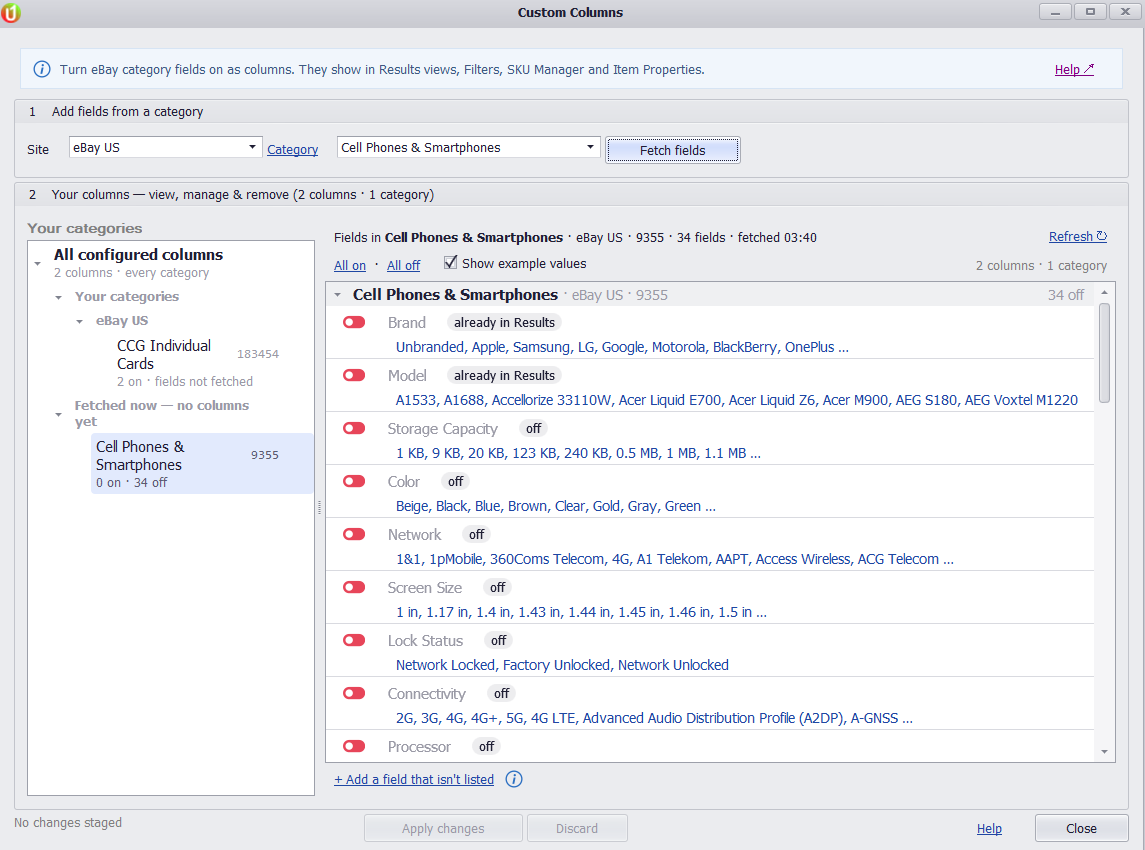
- Switch on the fields you want, then click Apply changes.
- Click Close and go back to Results.
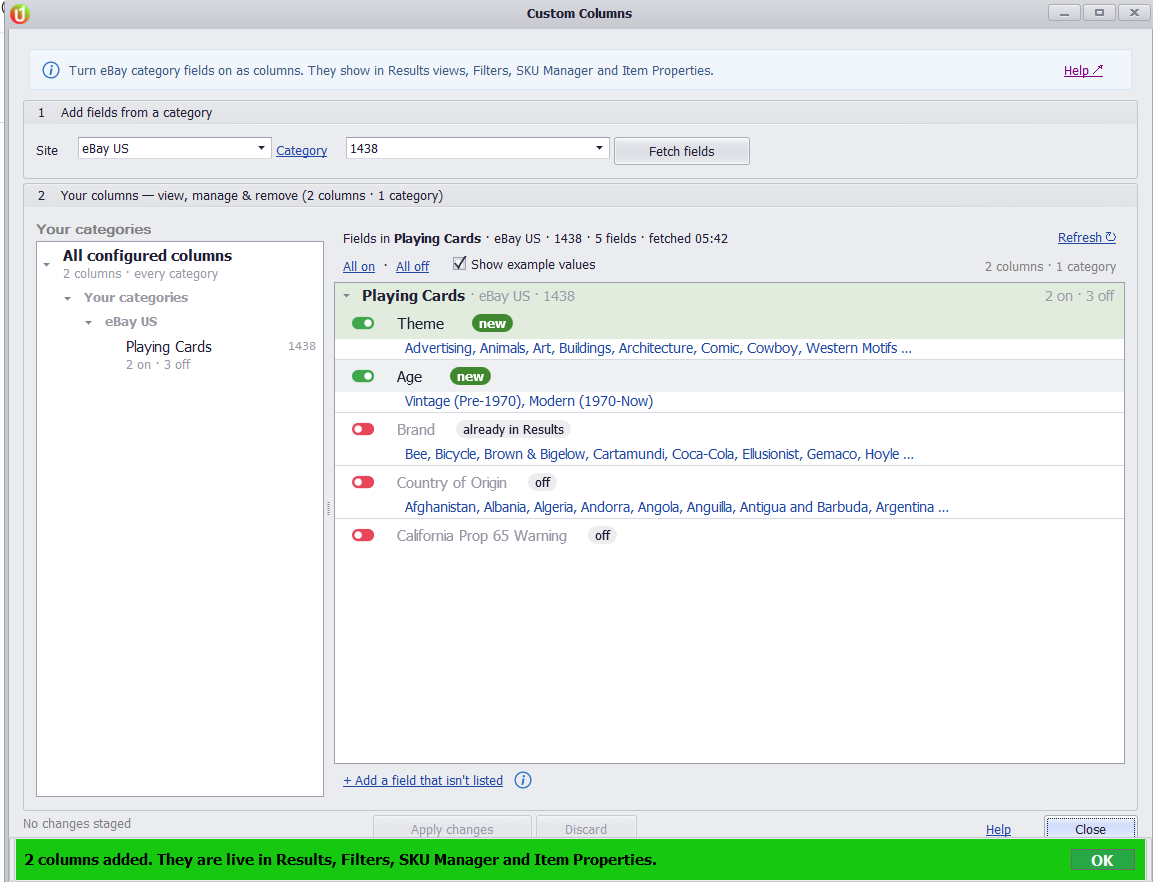
The new columns are added at the right-hand end of the results grid. Drag a column header to move it where you want it.
Custom columns fill in for listings that arrive after you add them. Rows already in the grid stay blank, so start or restart your search to see values.
You can also use these fields in filter rules. The full guide, with managing and removing columns, is Adding Item Specifics.
Filter Rules #
Filter rules colour cells or rows, hide listings, or run an action when a listing matches a condition you set. The results grid then shows at a glance which listings are worth a look.
Examples:
- Quantity is more than 1: colour the cell, so you know you can buy more than one.
- Feedback score is below your limit: hide the listing.
- Best Offer is True: colour the row, so you can offer below the asking price.
- A seller you like: colour the row, then decide on everything else.
Open the Filters panel #
Click Home → Filters, or the Filters tab at the right edge of the results grid.
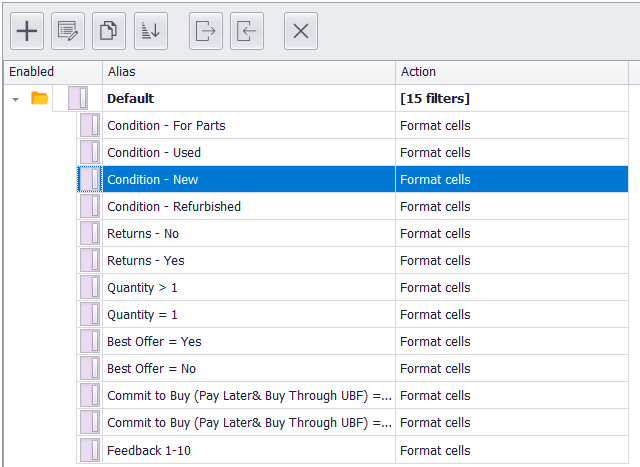
uBuyFirst comes with a set of rules for condition, returns, quantity, Best Offer and Commit to Buy. The toolbar adds, edits, copies, sorts, exports, imports and deletes rules. The switch in the Enabled column turns a rule on or off.
Add a rule #
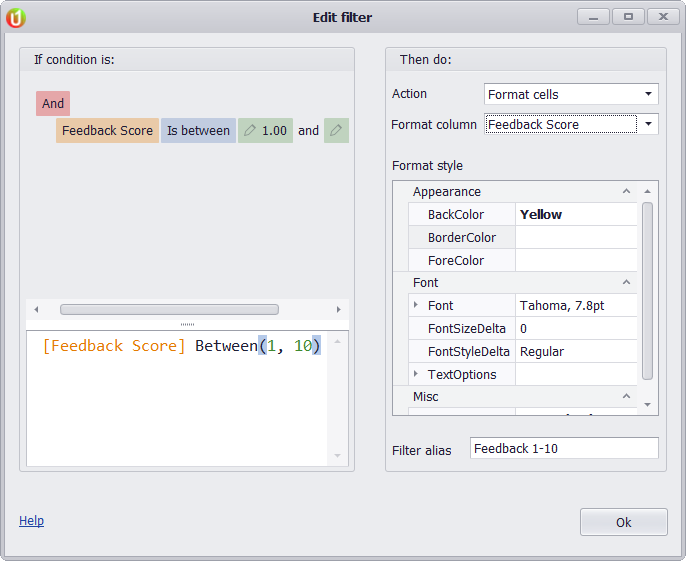
This example colours the Feedback Score cell yellow when the seller’s score is between 1 and 10.
- Click + in the Filters toolbar. The Edit filter window opens.
- Under If condition is, point at And and click the + that appears next to it. A condition row appears.
- Click the first box in the row, type Feedback and choose Feedback Score.
- Click the operator box and choose Is between. Enter 1 in the first value box and 10 in the second.
- Under Then do, leave Action as Format cells and set Format column to Feedback Score.
- Under Format style, click BackColor, open its list and choose Yellow.
- Type a name in Filter alias (here, Feedback 1-10) and click Ok.
Check that the new rule’s switch in the Enabled column is on. Rules apply to the listings already in the grid and to every new one.

Action also offers Format rows (colour the whole row), Remove rows (hide the listing), Open item page, Open checkout page, Apply AI Prompt, Send to Telegram, and an automatic buy through your linked eBay account.
The full guide, with search-term level filters, is Custom Filter Rules.


